How to Get Started with HubSpot Drag and Drop Emails

Read How We Achieved a 50% CTR By Modernizing
HubSpot’s drag-and-drop email editor is an easy-to-use tool that lets you drag and drop different elements to quickly build an email that matches your company’s brand guidelines. Before, marketers would have to rely heavily on developers to help create customized emails in HubSpot. Thanks to HubSpot’s drag-and-drop email editor, that’s no longer the case. Here’s out to get started building emails yourself using drag and drop.
How to Create a Drag and Drop Email
Unlike HubSpot’s drag-and-drop templates for pages, the templates for drag-and-drop email are not coded. So you can get started with drag-and-drop emails immediately without relying on a developer.
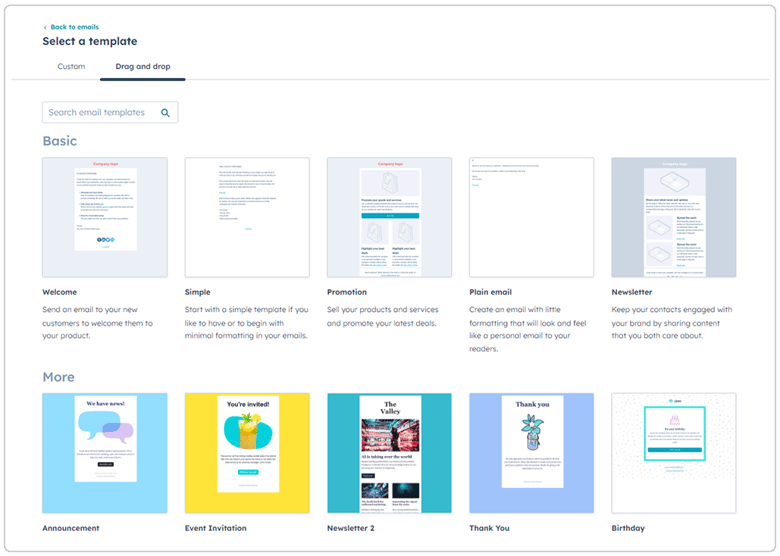
To create your first drag-and-drop email, you’ll create an email as you typically would by clicking the Create Email button in the email dashboard and choosing the type of email you want to make (Regular, Automated, Blog/RSS). Once you arrive at the Select a Template window, click the Drag and Drop tab. In this tab, you’ll find a variety of default HubSpot drag-and-drop templates you can use. Choose any template you’d like, but the Basic Welcome email is usually a good pick for a basic starting point.
 Once you have selected a template, you’ll be redirected to the email editor, where you can start editing the design and content of your email.
How to Edit the Design
HubSpot drag-and-drop emails provide basic design settings for customizing the email to your brand. You’ll find these settings in the left-hand sidebar in the Design tab. Here you’ll see settings for the Template, Text styles, Buttons, and Dividers.
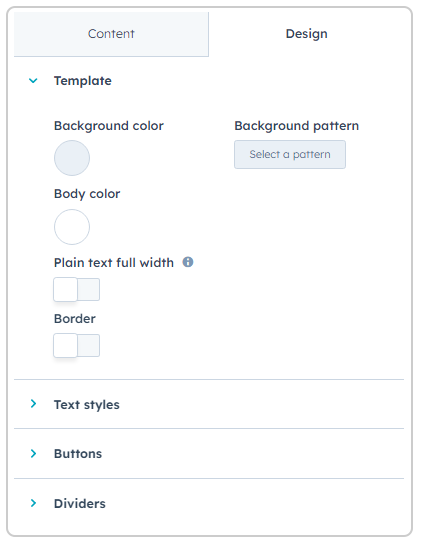 In the Template design settings, you can change the entire email’s background (including adding a background pattern image), the email body’s background color, switch to a full-width plain text email and add a border to your email body.
Text styles allow you to change the font family, size, line height, and color of paragraph text, H1s, and H2s. There’s also an option to change the color and text style of links in the email.
The Button styles only affect the default HubSpot Button module found in the Content tab’s list of modules. These settings allow you to change the border radius, background color, and font of the button.
Like the Button styles, the Dividers styles only affect the default HubSpot Divider module. It provides options to change the divider’s height, color, and style.
The default styling options in drag-and-drop emails are limited but are a good starting point for creating basic emails. You can later further customize the look and feel of your emails with the help of a developer, but for now, let’s move on to adding.content to your drag and drop emails.
Related Reading: How to Create a Child Theme with HubSpot’s Drag and Drop
How to Build Out Your Email
Clicking into the Content tab, you’ll see three lists of modules, layouts, and saved sections. To add any of these to your email, you must grab one, drag it to your email, and drop it where you want it placed.
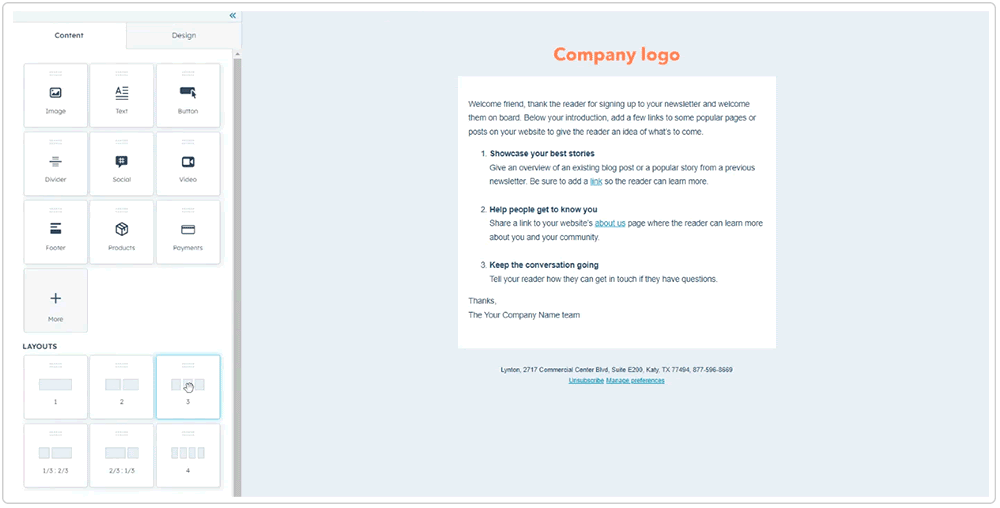
Layouts
Layouts are a drag-and-drop email’s main building blocks with one, two, three, and four-column options. Dragging one into your email creates a section to wrap around the content you place inside it.
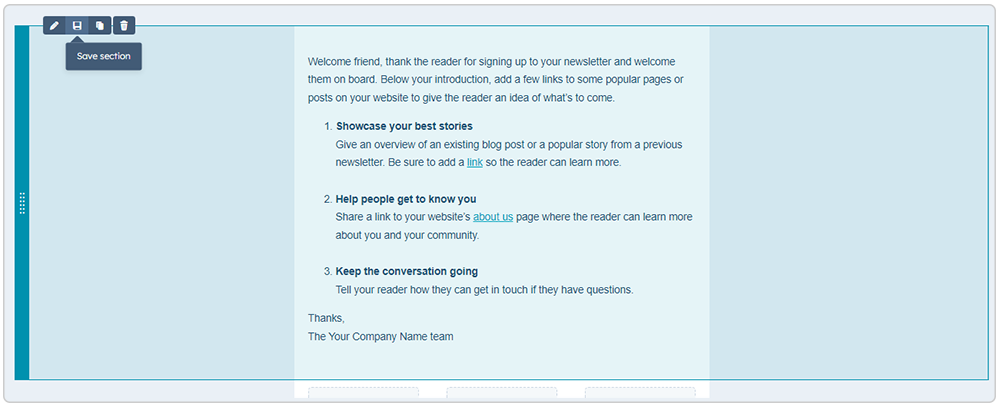
Hovering over a layout, you can click the icons in the top left to edit, save, clone, or delete the layout. Clicking the save icon will allow you to keep that layout to your Saved Sections which you can use in any other email you create.
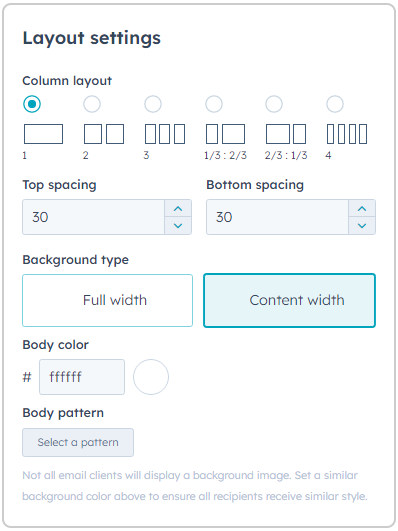
Clicking into a layout will open the Layout settings. In these settings, you can change the column layout, top and bottom spacing, the background type (whether to make it the full width of the email or to fit inside the body), and background.
Modules
Inside each column in a layout, you can drag in modules that are the actual content of the email. HubSpot provides several default modules (image, text, button, etc.), but you can also have a developer build custom modules for use in drag-and-drop emails. Hovering over a module you’ve added to your email will give you options to edit, clone, delete, and add smart rules to the module.
Related Reading: How to Use HubSpot’s Drag and Drop Editor
Save Your Drag and Drop Email as a Template
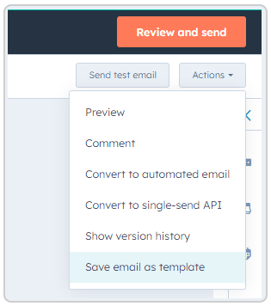 Once you have built out your email, you may decide to use this setup for future emails. You can easily create a drag-and-drop email template from built emails by clicking the Actions dropdown in the top right and choosing Save email as template.
This will pop up a dialog for you to name and save your template. Once saved, you can choose the template from the Select a Template window when creating a new email.
Perfect Your Emails With the Help of a Developer
As easy as it is to create emails on your own using HubSpot’s drag-and-drop editor, you may want more customization that isn’t possible with the limited options HubSpot provides. With the help of a developer, you can add custom fonts, column content with more flexibility, further cross-client compatibility, and more.
We have an expert team of HubSpot web designers and developers if you’re interested. Just reach out today.

Alyssa is a web developer with Lynton, with 10+ years experience coding in HubSpot. Specializing in front-end and email development, Alyssa is also knowledgeable in search engine optimization, accessibility compliance, cross-client compatibility, and various other web technologies.